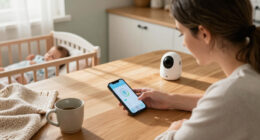
Set up a Wi-Fi baby monitor so you can check its video and sound from the manufacturer’s app while your phone is connected to the internet. This guide is for caregivers setting up a monitor for the first time; no networking experience is needed. Allow 30-60 minutes to install the app, connect the camera, choose a safe position, and test the connection. A Wi-Fi monitor can help you check in, but it does not replace direct supervision or safe-sleep practices.

Turn the school run and nap time into listening time
- Thousands of audiobooks, podcasts and originals
- Listen on your phone, tablet or Echo — also offline
- Cancel anytime

VTech VM901 Smart Wi-Fi Baby Monitor with 1080p Camera and 5-Inch Screen
- ✔ Camera resolution: 1080p
- ✔ Parent unit screen: 5-inch HD
- ✔ Camera movement: Pan, tilt, and up to 10x zoom

Blemil 5.5-Inch Smart Wi-Fi Baby Monitor with Camera
- ✔ Display: 5.5-inch IPS
- ✔ Video resolution: 1296p and 720p
- ✔ Wi-Fi: 2.4 GHz

1080p Wi-Fi Baby Monitor with Camera, Audio, and 4-Inch Screen
- ✔ Video: 720p video; supports up to 1080p display
- ✔ Screen: 4-inch IPS
- ✔ Connectivity: 2.4 GHz Wi-Fi and FHSS
Difficulty: Beginner | Time: 30-60 minutes
What You’ll Need
Tools & Materials:
- Wi-Fi baby monitor camera and included power adapter
- Smartphone or tablet compatible with the monitor app
- Stable home Wi-Fi connection and network password
- Mounting hardware or a stable shelf, depending on the camera design
Knowledge:
- How to install an app and follow its setup prompts
- How to enter a Wi-Fi password
- Basic familiarity with your home router and Wi-Fi network name
Check the monitor’s packaging or manufacturer support page for phone compatibility, Wi-Fi band requirements, and mounting instructions. Many cameras require a 2.4 GHz network; some routers combine 2.4 GHz and 5 GHz under one network name. Keep the camera, router, and phone near each other during pairing. Use the monitor as an added way to check in, not as a substitute for safe-sleep guidance or an adult’s judgment.
VTech VM901 Smart Wi-Fi Baby Monitor with 1080p Camera and 5-Inch Screen
The VTech VM901 makes the most sense for families who want a dependable split between a local parent display and phone-based remote access. Its 5-inch HD screen is larger than the 4-inch display on our compact-screen pick, while the camera’s 1080p video gives it a clear resolution advantage over that model’s stated 720p video. At home, the parent unit connects directly to the camera, so routine checks do not have to rely on app viewing.Camera controls make this more flexible than a basic fixed-view monitor: caregivers can pan, tilt, and zoom up to 10x from the parent unit or app. That range of adjustment can help when a baby moves around the crib, though it also means more controls to manage than a simple stationary camera. Movement and nursery temperature alerts, automatic night vision, and two-way talk cover the core monitoring needs. The app supports multiple caregivers, which is a practical distinction from a setup centered on one viewer.Compared with Blemil, the VTech has a slightly smaller screen and lacks the listed motion tracking and MicroSD or encrypted cloud storage options. Blemil also states a longer ECO-mode battery runtime, though that figure is tied specifically to ECO mode. VTech’s advantage is a straightforward balance of 1080p video, local viewing, and remote app access. Its stated parent-unit range is up to 1,000 feet, and remote app monitoring requires an internet signal, so it is not a substitute for checking connection needs around your home.
Pros:
- Combines a dedicated 5-inch HD parent unit with remote viewing through the MyVTech Baby app.
- 1080p camera with pan, tilt, and up to 10x zoom.
- Includes two-way talk plus movement and nursery temperature alerts.
- App access can be shared with multiple caregivers.
Cons:
- The stated direct parent-unit range is up to 1,000 feet and can depend on the setting.
- Remote app monitoring requires an internet signal.
- Does not list motion tracking or MicroSD and encrypted cloud storage.
Best for: Families who want a 1080p Wi-Fi camera, a dedicated 5-inch parent screen, and app access that can be shared with multiple caregivers.
Not ideal for: Caregivers who prioritize the largest display, motion tracking, or listed local MicroSD storage over a balanced parent-unit and app setup.
Bottom line: We rank the VM901 first for its strong mix of 1080p viewing, a useful parent screen, camera controls, and shared app access.
“We rank the VM901 first for its strong mix of 1080p viewing, a useful parent screen, camera controls, and shared app access.”
Blemil 5.5-Inch Smart Wi-Fi Baby Monitor with Camera
If a room-filling parent display and flexible recording options matter more than a simple feature set, Blemil’s 5.5-inch monitor is the specialist pick in this lineup. Its screen is the largest of the three, and the listed camera resolution reaches 1296p. That combination gives caregivers more display area and a higher stated resolution than the first monitor’s 720p camera video, while the VTech remains the more balanced choice for families focused on 1080p and straightforward app sharing.Blemil also adds automatic motion tracking to its pan and tilt. Rather than relying only on caregivers to reposition the camera, tracking can follow movement within the camera’s view. Sound, cry, and motion alerts broaden the ways the system can notify caregivers, and two-way audio supports quick reassurance. The parent unit’s stated runtime is up to 22 hours in ECO mode; because this is an ECO-mode figure, buyers should not assume the same runtime in every operating setup.Storage is another point of difference: Blemil supports MicroSD and encrypted cloud storage, giving families options for keeping footage. By comparison, the VTech product details emphasize shared app access and 10x zoom, while the smaller 4-inch monitor emphasizes lullabies and a feeding reminder. Blemil’s camera still needs corded power, and Wi-Fi pairing is limited to 2.4 GHz. Its larger screen and feature set make it less compelling for buyers who want a basic, small-footprint setup or do not need motion tracking and storage options.
Pros:
- Largest listed parent display at 5.5 inches.
- Camera supports pan, tilt, and automatic motion tracking.
- Sound, cry, and motion alerts with two-way audio and night vision.
- Supports MicroSD and encrypted cloud storage.
Cons:
- Camera requires corded electric power.
- Wi-Fi pairing supports only 2.4 GHz networks.
- The stated up-to-22-hour battery runtime applies to ECO mode.
Best for: Families who want the largest parent display in this comparison, motion tracking, and a choice of MicroSD or encrypted cloud storage.
Not ideal for: Buyers who want a simpler monitor, do not need recording options, or need a camera that can operate without a power cord.
Bottom line: We recommend Blemil for buyers who will use its bigger display, tracking, and storage choices, even though VTech is the more balanced everyday pick.
“We recommend Blemil for buyers who will use its bigger display, tracking, and storage choices, even though VTech is the more balanced everyday pick.”
1080p Wi-Fi Baby Monitor with Camera, Audio, and 4-Inch Screen
This monitor is the smallest-screen option in the group, with a 4-inch IPS display and app viewing for iOS and Android devices. That mix can suit families who want a dedicated screen without choosing the 5-inch VTech or 5.5-inch Blemil units. Its feature list is broad: pan and tilt, no-glow auto-IR night vision, cry and motion detection, two-way audio, lullabies, temperature monitoring, and a feeding reminder. Those extras make it more configurable for nursery routines than VTech’s stated movement and temperature alerts alone.There is an important resolution detail to weigh: although the product title refers to 1080p, the specifications state 720p video that supports up to a 1080p display. We would not treat that as equivalent to the VTech’s explicitly listed 1080p camera or Blemil’s listed 1296p resolution. The 4-inch size is easier to accommodate on a bedside table, but it also gives less viewing area than either competitor.The display is rated for up to 14 hours of use, providing a portable parent-unit option, while the camera base must stay connected to power. Like Blemil, it supports only 2.4 GHz Wi-Fi; unlike Blemil, the supplied details do not list MicroSD or cloud storage. The missing included stand and lack of water resistance are practical limitations, though water resistance is unlikely to matter for many indoor nursery setups. Choose it for its mix of alerts and soothing features, not for the strongest stated camera resolution or the largest screen.
Pros:
- Offers both an included parent display and an iOS or Android app.
- Pan and tilt with no-glow auto-IR night vision.
- Includes cry alerts, two-way audio, lullabies, and temperature monitoring.
- Display is rated for up to 14 hours of use.
Cons:
- Specifications list 720p video, despite the title’s 1080p wording.
- Camera base requires power, and a stand is not included.
- Wi-Fi supports only 2.4 GHz; no storage option is listed.
Best for: Caregivers who want a smaller dedicated display, phone app access, and extras such as lullabies, temperature monitoring, and feeding reminders.
Not ideal for: Buyers who prioritize explicitly listed 1080p camera video, a large parent display, or included mounting hardware.
Bottom line: We would choose this model for its compact screen and nursery extras, while buyers prioritizing stated camera resolution should favor VTech or Blemil.
“We would choose this model for its compact screen and nursery extras, while buyers prioritizing stated camera resolution should favor VTech or Blemil.”
As an Amazon Associate we earn from qualifying purchases.
Before You Start
Choose a camera location that gives a clear view without putting the camera, cord, mount, or other equipment within the child’s reach. Follow the manufacturer’s age and placement guidance, and keep cords well away from the cot or crib and other areas a child can reach. Do not place a camera inside the cot or attach it to a rail unless the manufacturer specifically permits that setup. If wall mounting, use the supplied hardware and check that the mount is secure before installing the camera.
Use a unique password for the monitor account. If the app offers two-factor authentication, plan to enable it after setup. Avoid sharing access broadly; give access only to caregivers who need it, and remove accounts when they no longer need access.
Step-by-Step Instructions
Step 1: Check compatibility and prepare the network
Read the camera’s setup guide and confirm that your phone’s operating system and Wi-Fi network meet its requirements. Find your network name and password, then place your phone near the router. If your router has separate 2.4 GHz and 5 GHz networks and the monitor requires 2.4 GHz, connect your phone to the 2.4 GHz network before pairing.
Tip: If the network name combines both Wi-Fi bands, check the router or monitor instructions for the recommended pairing method. Do not guess at router settings; changing them can disconnect other devices.
Check: You know which Wi-Fi network to use, have its password, and have confirmed that the phone can run the monitor app.
Step 2: Install the official app and create your account
Scan the setup guide’s app-store link or search for the app named by the manufacturer. Check that the publisher matches the monitor brand, then install the app. Create an account with an email address you can access, set a unique password, and complete any email or phone verification prompts.
Tip: Do not install an app from an unfamiliar link or give your account password to another caregiver. Use the app’s sharing controls to grant separate access when available.
Check: The official app opens and you can sign in to your account.
Step 3: Power the camera and add it in the app
Place the camera in its intended location, initially near the router for pairing. Connect only the supplied or manufacturer-approved power adapter, then wait for the indicator light or voice prompt that signals setup mode. In the app, choose the option to add a device and follow the prompts to scan a QR code, press a pairing button, or enter a device code.
Tip: Keep the camera powered while pairing. If it does not enter setup mode, use the manual’s reset or pairing instructions; a reset may erase existing settings.
Check: The app displays the camera as added or proceeds to the Wi-Fi connection screen.
Step 4: Connect the camera to Wi-Fi
Select the correct home network in the app and enter its password exactly, including capitalization. Keep the phone close to the camera until pairing finishes. Wait for the app’s confirmation and for the camera’s indicator to change to its connected state before moving it farther from the router.
Tip: A password copied with an extra space or a connection to the wrong Wi-Fi band can cause pairing to fail. Check the network name and re-enter the password carefully before trying again.
Check: The app shows the camera online and opens a live view or device status page.
Step 5: Secure the camera and choose its final position
Set a unique camera password if the app provides one, enable two-factor authentication on the account if available, and review who has access. Then install the camera in its final position according to the manufacturer’s instructions. Keep the camera and all cords out of reach, route cords away from the cot or crib, and check that the mount or shelf cannot tip or loosen.
Tip: Do not rely on a camera view to judge whether a sleep space is safe. Keep the sleep area arranged according to current safe-sleep guidance from your health authority.
Check: The camera is secure, stable, out of reach, and positioned to show the intended area without a cord hazard.
Step 6: Set useful video, audio, and alert options
Open the device settings and adjust the video quality, night vision, microphone, speaker, and notification options you plan to use. Turn on sound, motion, or temperature alerts only if the camera supports them and you understand what they detect. Set quiet hours or notification preferences so alerts fit your routine, and check whether the app needs permission to send notifications or use your local network.
Tip: An alert is not a guarantee that the camera will detect every sound or movement. Keep notification settings useful and continue checking the child directly as needed.
Check: The app displays the chosen settings, and the phone has the permissions needed for the features you enabled.
Step 7: Test the monitor from your usual viewing location
Open the live view from the room where you expect to check it. Confirm that the image is clear in the room’s normal lighting and in darkness if night vision is available. Test the microphone and speaker at a reasonable volume, then trigger a supported alert according to the manual. If you intend to check in away from home, test remote viewing using a trusted connection outside your home Wi-Fi, while keeping the camera in a safe position.
Tip: Keep the app open during the first test and check for delayed video, dropped audio, or repeated offline messages. Do not use the monitor’s temperature reading as a substitute for checking the room or the child.
Check: Video loads, audio works as expected, enabled alerts arrive, and remote access works if your model supports it.
Common Mistakes to Avoid
- Pairing the camera to an unsupported Wi-Fi band or entering the wrong network password. — Confirm the model’s network requirements, select the matching network, and re-enter the password carefully.
- Mounting the camera or routing its cord within a child’s reach. — Follow the manufacturer’s mounting directions and keep the camera, mount, and cords well away from the cot or crib and reachable areas.
- Sharing one account password with several caregivers. — Use separate app invitations or user accounts when available, and remove access when it is no longer needed.
- Assuming alerts or a live view replace direct supervision. — Treat the monitor as a check-in aid; respond to concerns by checking the child directly.
Troubleshooting
Problem: The camera will not pair with the app.
Solution: Move the phone and camera closer to the router, confirm that Bluetooth and local-network permissions are enabled if the app requests them, and check that the phone is on the supported Wi-Fi band. Restart setup using the manufacturer’s steps. Reset the camera only if the manual recommends it, since a reset can clear settings.
Problem: The app says the Wi-Fi password is incorrect or the camera stays offline.
Solution: Verify the network name and password on another device, then enter the password again without leading or trailing spaces. Check for a required 2.4 GHz network and confirm that the router allows new devices to connect. If the router recently changed, update the camera’s network details in the app.
Problem: The video freezes, looks blurry, or takes a long time to load.
Solution: Check the phone’s internet connection and the camera’s Wi-Fi signal in the app. Move the camera closer to the router if possible, reduce video quality in settings, or improve coverage with a compatible access point. Restart the camera and router if the manufacturer or internet provider recommends it.
Problem: Sound or motion notifications do not arrive.
Solution: Check that the relevant alert is enabled in the monitor app and that phone-level notifications are allowed. Review quiet hours, alert sensitivity, and app battery restrictions. Test again using the manufacturer’s method, and remember that detection depends on placement and settings.
What Success Looks Like
The setup is complete when the app shows the camera online, live video loads from your usual viewing location, and audio and enabled alerts behave as expected. Remote viewing should also work if your model supports it and you tested it away from home Wi-Fi. The camera should remain stable and out of reach, with cords routed away from the cot or crib. Your account should have a unique password, with two-factor authentication enabled when available.
Next Steps
Check the camera’s position and cord routing whenever you move furniture or change the sleep setup. Review app access from time to time, install app or camera updates through official channels, and remove accounts for caregivers who no longer need access. If the monitor repeatedly disconnects or behaves unexpectedly, consult the manufacturer’s support page and keep following safe-sleep and supervision guidance.
Frequently Asked Questions
Does a Wi-Fi baby monitor need internet access?
Many models use your home Wi-Fi for local viewing and an internet connection for remote access, alerts, or account features. The exact behavior varies by model. Check the manual to see what continues to work during an internet outage.
Can I use the monitor on a 5 GHz Wi-Fi network?
Some monitors support 5 GHz, while many require 2.4 GHz. Check the camera’s specifications. If your router combines both bands under one network name and setup fails, follow the manufacturer’s pairing guidance or contact its support team.
Can more than one caregiver view the camera?
Many apps allow the account owner to invite additional caregivers. Use individual invitations or accounts when available, and give each person only the access they need. Avoid sharing the owner’s login.
What should I do if my home Wi-Fi goes down?
Check the manual for offline behavior: some monitors retain local functions, while others lose video and alerts. Do not assume you will receive a notification during an outage. Check the child directly and use another reliable way to supervise until service returns.